

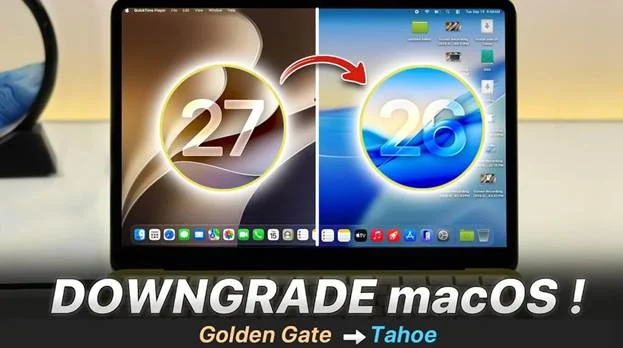
Not Happy with macOS 27? Return to a Stable Mac Safely
A new release of macOS always sounds fun at first. Then reality arrives, and some people quickly wish they had waited. Maybe your favorite design app crashes on launch, or maybe the battery is dying faster than last week. Some don’t like the new interface or notice fans spinning on tasks that were silent before. Whatever the reason, going back to macOS 26 Tahoe is a perfectly reasonable decision.
But there’s one thing you need to think about before you start touching any settings. As a rule, a major downgrade means wiping the startup disk, and whatever’s on that disappears. That is why, if you want to downgrade macOS 27 without losing data, you’ll need to back up your personal files first.
In this guide, we’ll show you three reliable ways: Time Machine, macOS Recovery, and a bootable installer. We also cover what to do if something goes wrong, including how a Mac data recovery service can help you recover lost files after macOS downgrade. Take your time, read each step, and you will have a stable Mac again.
Part 1: Can You Downgrade macOS 27 to macOS 26?
You can go back, but only if a few conditions are met. First, check whether your Mac model is compatible with macOS 26 Tahoe. Check this first, as newer models that shipped with macOS 27 may not accept an older system at all.
Second, you will need a valid macOS 26 installer or a backup. Apple doesn’t always make older installers easy to find, so it is wise to get one early. Many people confuse two different ideas here. When you reinstall macOS, a new copy of the operating system is installed on your Mac. Restoring Files Restores your photos, documents and settings.
The order is important. You install the operating system first, then use Migration Assistant or a compatible backup to bring your personal data over. Skipping that order is how files get lost, and it is the main reason people look for ways to downgrade macOS without losing data.
Part 2: What to Do Before Downgrading
Preparation takes less than an hour and prevents most downgrade disasters. Review this list before deleting anything.
| Requirement | Why It Matters |
| Full file backup | Protects files erased during installation |
| macOS 26 compatibility check | Prevents unsupported installation attempts |
| Stable internet and power | Reduces installation interruptions |
| macOS 26 installer or backup | Provides a valid downgrade source |
| App and license records | Simplifies post-downgrade setup |
Let us look more closely at each of these items. The full backup is the most important one, so don’t rush it. Copy to an external drive. Open a few files on the external drive to verify they work. Compatibility check is fast. Find your exact Mac model on Apple’s support pages and make sure that macOS 26 appears on the list.
People underestimate the importance of a stable connection and steady power. If a laptop crashes mid-installation, Recovery can take much longer. Plug in the charger and avoid using shaky Wi-Fi. Also, keep a simple list of your apps and license keys. Once you downgrade, you’ll reinstall many programs, so having the serial numbers handy will save you a lot of frustration.
Here’s a detail many guides skip. An older system backup might not include any files you created or changed while running macOS 27. Copy those newer files to a different folder or a drive so nothing gets lost in the cracks.
Already missing important files? Stop right there. Run Mac data recovery before you erase the disk or write more data to the Mac. Any new file saved to the drive could overwrite the very data you are trying to save.
Part 3: Three Ways to Downgrade macOS 27
Each method suits a different situation. Read all three before you decide, as the best option depends on what you’ve prepared earlier.
Method 1: Restore a Pre-Upgrade Time Machine Backup
This is the easiest route if you did a full backup before upgrading. That backup already has macOS 26, your apps, and your files as they were.
Follow these steps:
- Plug in the external drive where your Time Machine backup is located.
- Shut down the Mac, then start it up in macOS Recovery.
- On Apple Silicon, press and hold the power button until you see Startup Options, then choose Options.
- Restart your Intel Mac and immediately press and hold Command and R.
- Open Disk Utility and, if necessary, erase the startup volume.
- Return to the main Recovery window and choose Restore from a Time Machine backup.
- Pick your backup drive, then select the snapshot taken before the macOS 27 upgrade.
- Follow the prompts and wait for the Restore to finish.
Depending on how much data you have, it can take several hours. Don’t interrupt it and keep the Mac plugged in the whole time.
Note: This backup will not include any files created after the upgrade. You should have copied those separately beforehand, and you can put them back once you are running macOS 26 again.
Method 2: Reinstall Through macOS Recovery
Use this method when you have no usable backup but still want a clean system. It is simple, though it comes with an important catch.
The startup procedure differs between Mac types. Apple Silicon Macs start Recovery using the power button. Press and hold the power button until you see Startup Options. Intel Macs use keyboard combinations instead.
On Intel Macs, Command-R will reinstall the version already installed on the Mac. Option, Command, and R will give you the latest version compatible with your hardware. Shift+Option+Command+R loads the version that shipped with your Mac, or the closest available version.
Here is a warning you must not ignore. The macOS version Recovery offers varies by Mac model and key combination. Check which version is on screen before you delete anything. If Recovery offers only macOS 27, stop and use the bootable installer method. Erasing your disk and then discovering the wrong version is a painful lesson.
When the correct version appears, the steps are straightforward:
- Open Disk Utility in the Recovery window.
- Choose your startup volume, usually named Macintosh HD.
- Select Erase and accept the format Disk Utility recommends.
- Close Disk Utility, and then select the reinstall option.
- Follow the on-screen instructions, and the Mac will restart a few times.
Once installation ends, you will see the Setup Assistant. You can use Migration Assistant to migrate your data there, or finish setup and copy your files over manually.
Method 3: Use macOS 26 Bootable Installer
This option gives you the most control, and Apple says that bootable installers are handy if other installation methods don’t work. It’s more effort, but it’ll work on almost any compatible Mac.
First, download the full macOS 26 installer from an Apple-supported source. Next, get an external USB drive with enough space, preferably 32 GB or larger. Next, wipe that drive, so move any important files off it first.
Open Terminal and execute Apple’s createinstallmedia command. For example, if your drive is called MyVolume:
sudo /Applications/Install\ macOS\ Tahoe.app/Contents/Resources/createinstallmedia –volume /Volumes/MyVolume
At the prompt, enter the administrator password. Don’t panic; Terminal usually won’t show the characters you type. Then confirm the erase, and wait for the process to finish. Now start up your Mac from the installer. For Apple Silicon, press and hold the power button, then choose the USB drive from the startup options. On an Intel Mac, hold the Option key and restart, then choose the installer.
After it loads, open Disk Utility and erase Macintosh HD. Then quit Disk Utility and choose to install macOS 26 on that volume. The Mac will restart several times, so be patient and keep it plugged in.
Some Intel Macs equipped with security chips may default to disabling external startup. If you don’t see your drive, go to Recovery and check the startup security settings to allow booting from external media.
Part 4: Recover Files Lost During the Downgrade
Even careful people sometimes lose a folder or two. Maybe the backup did not catch a recent project, or something was erased before everything was copied. Don’t panic, because Recovery may still be possible.

4DDiG Mac Data Recovery can scan a recognizable Mac or external storage device to find missing photos, videos, documents and other files. It’s a practical option when you need to recover lost files after macOS downgrade, and you don’t have a backup.
Here’s how the process usually works:
- Download and start 4DDiG Mac Data Recovery, then choose the affected drive from the list.

- Start the scan, and it will search for lost data. Larger drives take more time.


- Filter to narrow results by file type and preview the items you want.

- Select the files and restore them to another drive.

That last step is crucial. Don’t save recovered files back to the drive you just scanned, as this may overwrite other data you are still hoping to recover.
We should also be honest about the limits. No tool can deliver perfect results every time. Whether the new data has overwritten the old files, whether the drive was encrypted, how the SSD’s behavior affects deleted data, and the device’s physical condition will determine success.
The practical lesson is simple. The sooner you stop using the affected drive, the better your chances. When you need Mac data recovery, quick action matters more than any particular software choice.
Part 5: Post-Downgrade Checklist
Once macOS 26 is up and running, a few final touches will keep the system healthy. Calmly work through this list.
- Turn off beta updates in System Settings so that your Mac doesn’t drift back to macOS 27.
- Install all available macOS 26 updates – you want the latest fixes and security patches.
- Restore your personal files from backup, including those newer files you copied separately.
- Reinstall your apps and check that each one works with macOS 26.
- Make sure that iCloud is syncing and that Photos, Drive and Notes are updating normally.
- Make sure your backups are working, then do a fresh Time Machine backup of the clean system.
That last point deserves emphasis. A backup you never tested is a hope, not a safety net. Open a couple of files from the new backup and check they restore correctly.
Final Words
It’s not hard to get back to a stable system, but the sequence in which you do things matters. To downgrade to macOS 27 safely, back up your files and copy the newer ones separately. Then, confirm your Mac can run macOS 26 and that you have a valid installer.
Then select the method that suits your situation. Use Time Machine if you have a pre-upgrade backup, macOS Recovery for a quick clean install, or a bootable installer when other options fail. Always verify the displayed version number before erasing a disk.
If anything is missing, stop using the drive and run 4DDiG Mac Data Recovery right away. With a little patience and a good plan, you can downgrade macOS without losing data and get a stable Mac again.
FAQs
1. Can I downgrade macOS 27 without losing data?
A downgrade cannot be guaranteed to preserve data because it often requires erasing the startup disk. Create a complete backup before starting and copy recent files separately.
2. Does downgrading macOS erase everything?
A clean downgrade erases applications, settings, and personal files from the selected volume. Back up the Mac and verify that the backup is accessible first.
3. Can I use a macOS 27 Time Machine backup on macOS 26?
Restoring from a newer system may cause compatibility problems. A pre-upgrade macOS 26 backup is preferable, and you can transfer newer personal files separately where compatible.
4. What should I do if my Mac will not start after downgrading?
Start in macOS Recovery, check the internal disk with Disk Utility, and reinstall a compatible macOS version. Seek professional support if the drive is not detected.
5. Can 4DDiG recover files lost after a macOS downgrade?
4DDiG data recovery may locate recoverable files if the storage device is detectable and the data has not been overwritten. Stop using the affected drive and save recovered files elsewhere.

Sandra Larson is a writer with the personal blog at ElizabethanAuthor and an academic coach for students. Her main sphere of professional interest is the connection between AI and modern study techniques. Sandra believes that digital tools are a way to a better future in the education system.