
You already have photos. Product shots, selfies, sketches, old family pictures, screenshots of a rough layout. The question is how to make them better, different, or more useful without starting from zero.
That is the idea behind image-to-image technology. Instead of generating a picture from words alone, you begin with an existing image and let the AI transform it. Tools such as the EzMaker AI photo editor are making this approach accessible to people who have never opened professional design software.
This guide explains what image-to-image generation is, where it shines, and how to get results you will actually want to use.
What Does “Image-to-Image” Mean?
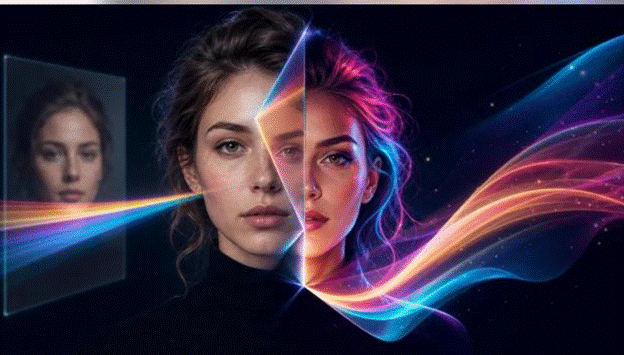
In a standard text-to-image workflow, you type a prompt and the AI invents a picture from scratch. In an image-to-image workflow, you supply a starting image and, usually, a short description of the change you want. The AI keeps the underlying structure of your original, such as the pose, layout, or composition, while altering style, mood, details, or surroundings.
Think of it as tracing paper with a very talented assistant. Your image provides the skeleton, and the AI repaints everything around it.
This gives you far more control than text alone. If you have ever typed a long prompt and received something that looked nothing like what you imagined, you will appreciate having a visual anchor.
Why It Beats Starting From Scratch
You keep what already works. If a photo has the right framing and subject, you do not need to risk losing that by regenerating from a prompt.
Consistency becomes easier. Running several images through the same style produces a set that looks cohesive, which is valuable for brands, portfolios, and social feeds.
Rough ideas become polished visuals. A hand-drawn sketch or a simple mockup can turn into a detailed illustration or realistic render.
It saves time. Instead of rebuilding a scene, you adjust one that exists.
Things You Can Do With It
Change the artistic style. Turn a regular photo into a watercolor painting, anime frame, pencil drawing, or oil portrait. This is a popular way to create profile pictures and gift artwork.
Refresh product photography. Place the same product in different settings, such as a kitchen counter, a beach, or a minimalist studio, without arranging new shoots.
Develop sketches into finished art. Designers and hobbyists can scribble a concept and watch it become a full-color illustration.
Restyle interiors and spaces. Upload a photo of a room and explore how it might look with different colors, furniture styles, or lighting.
Revive old photos. Faded or damaged pictures can be enhanced, recolored, or reimagined, which many people find especially meaningful for family archives.
Create variations for testing. Marketers can produce several versions of a banner or ad visual to see which resonates.
How to Get Started: A Simple Walkthrough
You do not need technical knowledge to begin. Here is a straightforward process.
Step 1: Choose a strong source image. Clear, well-lit images with a distinct subject give the AI more to work with. Blurry or cluttered originals tend to produce muddled results.
Step 2: Decide on your goal. Are you changing the style, the setting, the mood, or the details? Knowing this before you start keeps your prompt focused.
Step 3: Pick a tool. If you want to experiment without paying, an image to image AI free option is a low-pressure way to learn how the process responds to different inputs.
Step 4: Write a short, clear prompt. Describe the change, not the whole picture. For example: “Transform into a soft watercolor painting with pastel colors” works better than a paragraph of unrelated details.
Step 5: Adjust the strength. Many tools let you control how closely the output follows your original. A low setting keeps the result near the source, while a high setting gives the AI more creative freedom.
Step 6: Generate several versions. Compare them and choose the best. Small changes in wording or strength can shift the outcome noticeably.
Prompting Tips for Better Transformations
- Focus on the change. The AI already sees your image, so you do not need to describe every object in it.
- Use style words precisely. Terms like “gouache,” “retro poster,” “cinematic lighting,” or “soft studio light” steer the look effectively.
- Mention what to preserve. Phrases such as “keep the same pose” or “maintain the original composition” help protect elements you like.
- Iterate in small steps. If a result is close, tweak one variable at a time. This teaches you how the tool behaves.
- Save winning combinations. Note the prompt and strength setting that worked so you can repeat it on other images.
Mistakes That Hold Results Back
Using low-quality sources. The AI cannot fully rescue a tiny, pixelated image. Start with the best version you have.
Pushing the strength too high. At extreme settings, your original may be barely recognizable. If you want the subject to remain the same, stay moderate.
Writing overcomplicated prompts. Long lists of conflicting instructions confuse the model. Keep it simple.
Skipping the final review. Always zoom in. Generated images can contain warped fingers, odd textures, or unreadable text that needs fixing before publishing.
Ignoring the output format. Consider where the image will appear. A vertical story graphic and a wide website banner need different crops.
Using It Responsibly
Powerful tools deserve thoughtful use. A few principles are worth keeping in mind:
- Respect consent and privacy. Only transform photos of people when you have permission, particularly if you plan to share the result publicly.
- Do not mislead. Altering an image to deceive viewers, such as presenting a fabricated scene as real news, is harmful and irresponsible.
- Check ownership and licensing. Make sure you have the right to modify and publish the original image, and read the platform’s terms for commercial use.
- Credit and disclose when appropriate. If authenticity matters to your audience, be open about the use of AI.
A Workflow You Can Reuse
Once you understand the basics, you can build a repeatable routine:
- Collect source images that fit your project.
- Choose one consistent style or look.
- Run each image through the same prompt and settings.
- Select the best outputs and touch them up.
- Export in the correct dimensions for each platform.
This approach keeps your visuals cohesive and saves you from reinventing the process every time.
Final Thoughts
Image-to-image AI changes how people think about creative work. You no longer have to choose between settling for the photo you have and starting over entirely. You can build on what exists, shape it toward your vision, and produce results that feel personal and polished.
Begin with one photo you already love. Try a single style change, compare the outcomes, and notice what the tool does well. After a few experiments, you will develop an instinct for it, and ordinary pictures will start to look like raw material for something much better.

Caroline is doing her graduation in IT from the University of South California but keens to work as a freelance blogger. She loves to write on the latest information about IoT, technology, and business. She has innovative ideas and shares her experience with her readers.