
Ever wonder why professional streamers have those jaw-dropping, perfectly-lit gaming rooms? It’s not just for looks—proper lighting is a game-changer for performance, comfort, and content quality. Studies show that ambient lighting can reduce eye strain by up to 50% during marathon gaming sessions, while the contrast between a bright screen and a dark room causes fatigue, headaches, and slower reaction times. Beyond health benefits, strategic lighting creates an immersive atmosphere and makes streams look professional. Whether you’re working with a $30 budget or ready to invest in a premium setup, this guide covers everything from basic solutions to smart home integration, helping you transform your gaming space into something both functional and epic.
1. Why Lighting Matters in Your Gaming Space
Reduces Eye Strain During Extended Sessions
Marathon gaming sessions shouldn’t cost you your eye health. When you stare at a bright monitor in a dark room, your pupils constantly adjust between the screen and the surroundings, causing fatigue and headaches. Ambient lighting behind your monitor creates a buffer zone that reduces this harsh contrast. The 20-20-20 rule (every 20 minutes, look 20 feet away for 20 seconds) works even better with proper lighting. For gamers clocking 4-6 hour sessions, proper lighting isn’t optional—it’s a performance tool.
Creates Immersive Atmosphere
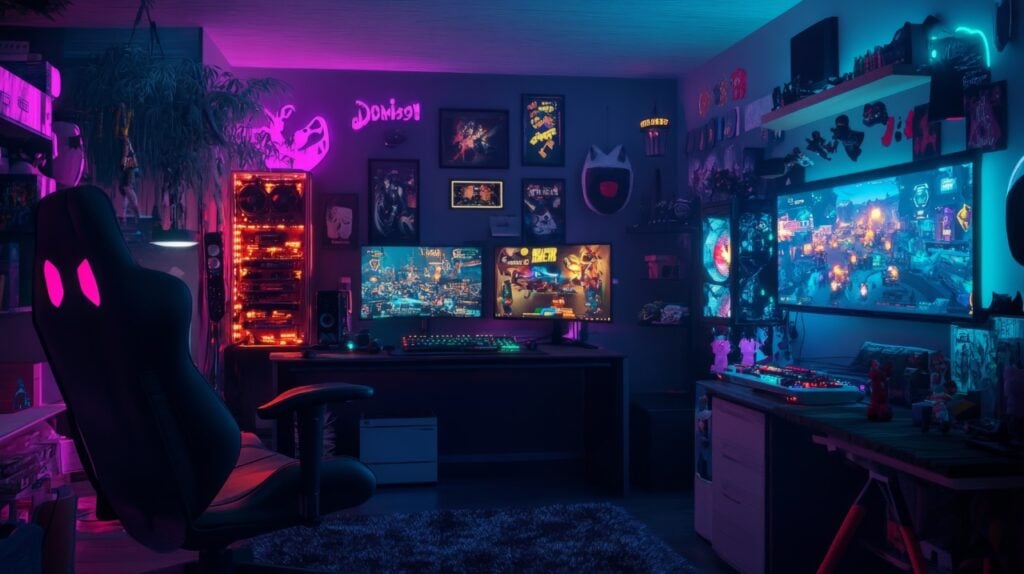
Lighting transforms your emotional connection to games. Playing Resident Evil in bright overhead lights feels completely different than in a room bathed in dim red or purple glow. Color psychology matters—warm colors like red create excitement for shooters, while cool blues promote focus for strategy games. When your physical environment mirrors the game’s mood, immersion deepens significantly.
Essential for Streaming and Content Creation
If you’re streaming, lighting is critical. Proper face lighting can make a $50 webcam look like a $300 camera, while poor lighting makes expensive equipment look amateur. A well-lit setup with thoughtful background lighting signals professionalism and keeps viewers engaged. Your lighting becomes part of your brand identity, making your stream instantly recognizable.
2. Types of Gaming Lighting: Pros, Cons, and Best Uses
RGB LED Strips
RGB LED strips have become the gold standard for gaming setups, and for good reason. These flexible strips can be placed virtually anywhere: behind monitors for a halo effect, along desk edges to highlight your peripherals, or around the ceiling perimeter for indirect room lighting.
Pros: The main advantage is customization. Most RGB strips connect to apps or controllers that let you select from millions of colors, create patterns, and even sync lighting with in-game events through software like Razer Chroma or Corsair iCUE. They’re surprisingly affordable, with basic kits starting around $15-20, and they’re energy-efficient.
Cons: Installation can be tricky, especially for addressable RGB strips that require careful wire management. Some gamers find them distracting, particularly strips with bright, pulsing patterns. The adhesive backing can fail over time, and cheaper strips may have inconsistent color accuracy across the entire length.
Best for: Tech-savvy gamers who enjoy tinkering with settings and want full control over their environment. If you’re building a multi-monitor setup or have RGB peripherals you want to synchronize, LED strips are essential.
Smart Bulbs
Smart bulbs like Philips Hue, LIFX, or Wyze Color Bulbs bring intelligence to your gaming space without requiring any installation beyond screwing in a bulb. These connect to your home WiFi and can be controlled via smartphone apps, voice commands, or even gaming integrations.
Pros: Installation is literally as simple as changing a light bulb. Voice control lets you adjust lighting without pausing your game, and whole-room coverage is instant. Many smart bulbs integrate directly with gaming platforms, automatically adjusting room lighting based on what’s happening on screen.
Cons: The initial investment is substantial—a starter kit with hub and bulbs can run $100-200. You’ll need a smart home hub for full functionality, and there’s a learning curve to setting up automations. Additionally, smart bulbs in standard lamps might not provide the directional lighting gamers need.
Best for: Gamers who already have smart home systems or want to integrate gaming lighting with other home automation. They’re perfect for those who value convenience over precise placement control.
Fairy Lights & String Lights
Don’t overlook the humble fairy light. While they might seem more suited for bedrooms than gaming setups, creative gamers have discovered that string lights offer a warm, ambient glow that’s perfect for reducing eye strain without the harsh intensity of some LED solutions.
Pros: Fairy lights are incredibly affordable (often $10-25), require no electrical expertise to install, and provide soft, diffused lighting that’s easier on the eyes during extended sessions. They’re perfect for renters since they use damage-free mounting options like command hooks or clips. The warm white or soft yellow glow creates a cozy atmosphere that balances out the cool blue tones of most monitors.
Cons: Unlike smart RGB strips, standard fairy lights aren’t programmable and typically offer only one color. They don’t sync with games or respond to voice commands.
Best for: Budget-conscious gamers, those creating cozy or aesthetic-focused setups, and renters who can’t do permanent installations. They’re excellent for adding character without overwhelming your space.
Where to place: String fairy lights behind monitors for a subtle backlight, drape them along shelves displaying collectibles and gaming memorabilia, create a ceiling canopy above your gaming station for a starfield effect, or frame gaming posters and artwork to draw attention to your personality.
For quality fairy lights that can withstand long gaming sessions, LED fairy lights from Ultra Bright Lightz offer superior longevity compared to traditional incandescent versions. Modern LED fairy lights last 25,000-50,000 hours and stay cool to the touch, making them safe for prolonged use near electronics and gaming equipment.
Bias Lighting
Bias lighting might not be glamorous, but it’s one of the most functional lighting solutions for gamers. This refers to the soft light placed directly behind your monitor, typically using USB-powered LED strips that draw power directly from your monitor or PC.
What it is: A strip of neutral white LEDs (usually 6500K color temperature) mounted on the back of your monitor, providing indirect illumination to the wall behind the screen.
Pros: Bias lighting improves perceived contrast and color accuracy on your display while dramatically reducing eye strain. It’s the most scientifically-backed lighting solution for screen time. Many options are USB-powered, requiring no additional outlets.
Cons: While functional, bias lighting offers limited aesthetic value. It’s always the same neutral white, which doesn’t contribute to the visual drama of RGB setups.
Best for: Health-focused gamers who prioritize eye comfort over aesthetics, competitive players who need optimal screen clarity, and anyone experiencing regular headaches after gaming sessions.
Neon Signs & LED Art
For gamers wanting a statement piece, custom neon signs or LED wall art create instant personality. Whether it’s your gamertag, favorite game logo, or an inspirational quote, these lights become conversation starters and focal points.
Pros: Modern LED neon signs are affordable compared to traditional glass neon, energy-efficient, and available in countless custom designs. They make your gaming space unmistakably yours and photograph well for social media or streaming backgrounds.
Cons: They’re less flexible than other options—once installed, they’re not easily moved or reconfigured. Custom designs can be expensive ($50-200+), and they provide limited functional lighting.
Best for: Dedicated gaming rooms with established themes, streamers building a brand identity, or gamers who want a permanent installation that expresses their personality.
3. Lighting Placement Strategies for Maximum Impact
Behind Your Monitor(s)
The area behind your monitor is prime real estate for lighting, where LED strips or fairy lights create a halo effect that serves both functional and aesthetic purposes. For bias lighting, aim for brightness around 10% of your monitor’s brightness—bright enough to reduce contrast but not distracting. Multi-monitor setups benefit from continuous lighting across all screens, and you can layer effects by installing neutral white bias lighting directly on monitor backs, then adding colored LED strips or fairy lights on the desk behind for aesthetic appeal.
Desk and Workspace Illumination
Your desk needs task lighting that lets you see your keyboard and peripherals without creating screen glare—small LED desk lamps with adjustable arms work well when positioned to the side, or try light bars that sit on top of monitors. If you have RGB keyboards and mice, minimal desk lighting lets those colors shine, as excessive overhead lighting washes out your RGB scheme. Consider under-desk LED strips that provide upward and outward glow, creating an atmosphere without glare.
Ceiling and Wall Accent Lighting
Ceiling lighting creates depth and makes gaming rooms feel larger by running LED strips or fairy lights along crown molding or ceiling edges for indirect lighting that bounces off the ceiling. For a starfield effect reminiscent of high-end home theaters, drape fairy lights across the ceiling in random patterns, or use fiber optic kits for permanent installations. Corner uplighting—placing LED strips in room corners aimed at the ceiling—adds dramatic shadows and dimension that make streaming backgrounds more visually interesting.
Shelving and Display Case Lighting
Your gaming collectibles and memorabilia deserve proper illumination with LED strips for long shelves, battery-powered puck lights for enclosed cases, or fairy lights woven between items for a whimsical effect. The key is highlighting what matters by focusing light on your most prized pieces rather than illuminating everything equally—this creates a visual hierarchy that draws the eye to your best items. Museums use this technique, and you can achieve museum-quality displays without museum-level budgets.
Streaming Background Setup
For content creators, background lighting separates amateurs from pros, with the basic principle being three-point lighting (key light, fill light, and backlight), though many budget streamers skip formal setups and focus on great background lighting instead. Placing LED strips, fairy lights, or neon signs in the background creates depth and visual interest—lights should be bright enough for the camera but not competing with your face for attention, with different depths creating layers for dynamic visuals. Affordable alternatives to ring lights include softbox lamps, LED panels, or strategically placed desk lamps with diffusers, with the goal being to eliminate harsh shadows while keeping backgrounds interesting.
4. Budget-Friendly Lighting Setups (Under $50)
You don’t need to spend hundreds to dramatically improve your gaming space. A basic RGB LED strip kit behind your monitor ($15-20) provides functional bias lighting with remote control convenience, while warm white LED fairy lights draped from the ceiling ($10-15) create a cozy atmosphere using damage-free command hooks. For purely functional eye strain reduction, USB-powered bias lighting strips ($8-12) plug directly into your monitor and are incredibly affordable. Purchase from retailers with good return policies so you can test brightness levels, and always measure your space before buying—nothing’s more frustrating than strips that are too short. Start with temporary installations using command strips before committing to permanent adhesive.
5. Mid-Range Gaming Lighting Setup ($50-$200)
This budget range unlocks significantly more functionality with smart LED strips ($30-60) from brands like Govee, Philips Hue, or Nanoleaf that offer app control, voice integration, and music sync features with much better color accuracy than budget options. A combination setup ($100-150) pairs bias lighting behind monitors with decorative fairy lights for shelving, an adjustable desk lamp, and one statement piece like a neon sign—this layered approach creates depth and serves multiple purposes. Addressable RGB strips ($40-80) take things further by displaying multiple colors and patterns simultaneously, creating flowing effects and reactive patterns that respond to audio for truly dynamic lighting.
6. Premium Gaming Lighting Setup ($200+)
For serious streamers and gaming enthusiasts, a Philips Hue full-room ecosystem ($250-500) offers multiple smart bulbs and lightstrips controlled through one system, with integration that makes your room lighting react to in-game events. Nanoleaf panels ($200-400) mount on walls to create stunning visual effects perfect for streaming backgrounds, while professional streaming lighting kits ($150-300) with softbox lights and LED panels eliminate shadows and dramatically improve camera quality. Hardware controllers like the Elgato Stream Deck ($100-200) let you control all lighting with programmable buttons for instant scene changes. If you’re monetizing content, premium lighting pays for itself through improved production value, faster channel growth, and sponsor opportunities.
7. Color Psychology for Gaming Spaces
Understanding color psychology helps create lighting schemes that enhance your gaming experience. Blue promotes focus and calmness for strategy games, red increases energy and intensity for shooters and racing games, green provides balance for casual gaming and streaming, purple encourages creativity for RPGs, and warm white/amber (2700K-3000K) reduces eye strain during marathon sessions while protecting sleep quality. Smart lighting systems make it easy to create preset scenes like “Competitive Mode” (blue), “Horror Game Night” (red/purple), “Streaming” (neutral white), and “Late Night Gaming” (warm amber), allowing you to instantly change your space’s mood to maximize performance and comfort.
8. Installation Tips and Common Mistakes to Avoid
Before buying, use a flexible measuring tape to map out exactly where lights will go and add 10-15% for corners and obstacles—LED strips can’t be extended if too short. Invest in cable management tools like clips and sleeves from the start, calculate total wattage to avoid overloading outlets, and remember that more isn’t always better—lighting that’s too bright creates glare and increases eye strain, so start with lower brightness and increase gradually. For renters, use command strips or 3M hooks and test adhesive on hidden areas first, while permanent setups should be photographed before installation. Always run your lighting setup for several gaming sessions with temporary mounting before committing to permanent installation, as you might discover better positioning or find certain colors too distracting in practice.
9. Maintaining Your Gaming Lighting Setup
Proper maintenance extends the life of your lighting investment. Every few months, power down your lights and gently wipe them with a microfiber cloth to remove dust buildup that reduces brightness and causes overheating. Check LED strip connections periodically, as they can loosen over time at solder points or clips—if sections stop working, inspect connections before assuming the LEDs are dead, since a poor connection is an easy fix. Keep smart lighting firmware updated through your app notifications to improve performance, fix bugs, and maintain security.
LED lighting is extremely energy-efficient, with a full gaming room setup running 8 hours daily costing less than $5 monthly in electricity (though older incandescent lights cost significantly more). When deciding whether to repair or replace, consider that individual LED failures are hard to fix unless you’re comfortable soldering—if less than 20% of your strip is dead, repair might be worthwhile, but if the adhesive is failing, try mounting clips instead of replacement. Smart bulbs and controllers have longer lifespans and are worth replacing when they fail since they’re individual units rather than entire strips.
Conclusion
Lighting transforms your gaming space from functional to inspiring, whether you’re reducing eye strain, creating atmosphere, or upgrading your stream. The best part? You don’t need to invest everything at once—start with a basic LED strip or fairy lights, then expand as your budget grows. Experiment with different colors and brightness levels until it feels right. The best lighting setup isn’t the most expensive—it’s the one that makes you excited to game and reflects your personality. Whether that’s minimalist bias lighting, cozy fairy lights, or full RGB maximalism, your gaming room is your sanctuary.

Elara is a dynamic writer and blogger who specializes in pop culture and movie reviews. With a background in film studies and journalism, she combines her deep knowledge of the entertainment industry with a sharp, insightful writing style that keeps readers coming back for more.


