

[Quick Guide] How To Remove Flickering From Video?
A flicker in videos is a frequent problem that numerous users face when viewing or editing clips. It can be an irritating experience when the reasons for flickering are not obvious. This article will walk you through possible causes of video flickering and offer you practical solutions. We’ll cover multiple approaches, from using advanced software to adjusting camera settings such as aperture and exposure.
Part 1. Why is Your Video Flickering? Understanding Potential Reasons
Part 2. High-Quality Video Repair: Remove Flickering From Video Offline
Part 3. How To Remove Flickering From Video: Other Solutions
Part 1. Why is Your Video Flickering? Understanding Potential Reasons
Video flickering can arise from a variety of causes, often depending on the context in which it occurs. Identifying the root cause is essential to remove flickering from video and ensure a smooth playback.
- Display Issues: If your screen refresh rate is incompatible with the video frame rate, you might face video flickering. Other potential reasons include incompatible resolution settings or color depth between the display and the video source.
- File Corruption: When the data within a video file becomes damaged, it gets difficult for a media player to read it correctly. Corruption may happen due to interrupted downloads, storage device errors, or malware in the device.
- Media Player Issues: Compatibility problems with codecs or resolution settings may cause video flickering issues with the media player. Your video player may struggle to decode specific visual formats if their codecs are not installed or if the player is outdated.
- Hardware Limitations: When your system fails to handle your video’s resolution or frame rate, you may face hardware restrictions. The playback may buffer or flicker if your CPU or GPU does not decode the video.
Part 2. High-Quality Video Repair: Remove Flickering From Video Offline
As discussed above, video corruption can cause the issue of flickering. If you discover that your footage is affected by this problem, a dependable option such as Wondershare Repairit – Video Repair can be useful. It uses an advanced video repair feature which restores damaged or corrupted videos from different issues such as faulty file transfers.
This software allows users to repair corrupted video files in 20 different formats, such as MOV, MP4, and more. It fixes videos recorded from different devices, which includes smartphones and cameras. In addition, this repair software is recognized for its impressive success rate in fixing videos, which distinguishes it from its rivals.
Key Features
- Batch Video Repair: On this software, users can add multiple corrupted videos at once for repair to save time and effort.
- Advanced Repair Mode: Repairit’s advanced repair mode can fix severely damaged videos with the help of sample videos you added and has a more competitive success rate.
- Preview Feature: Users can easily preview and validate repaired videos to ensure optimal quality before saving them to their devices.
- Repair HD & 4K: Using this tool, you can effortlessly repair high-resolution videos, including HD, 4K, and 8K formats.
Walkthrough Guide to Use Wondershare Repairit For Video Repair
Upon discussing Repairit’s video repair feature, let’s delve into the guide for using it for seamless video restoration to remove flickering from video.
Step 1. Import the Videos With the Flickering Issue
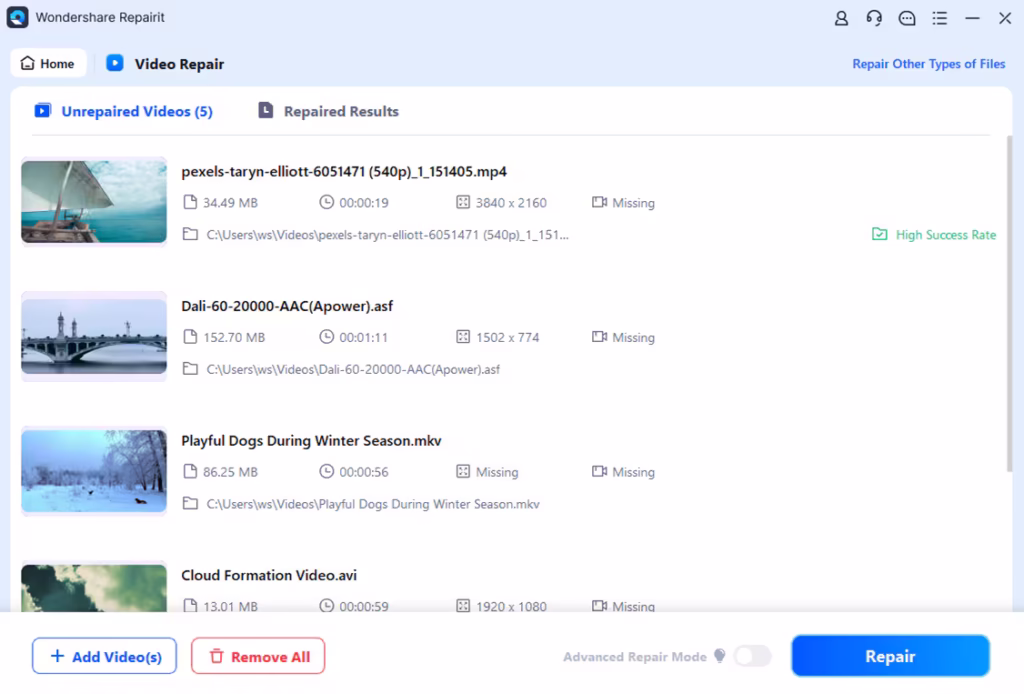
After downloading and installing the latest version of software on your PC, launch it to enter its main interface. From here, head to the “Video Repair” section and click the “+Add” button to import the corrupted videos with flickering issues for repair.
Step 2. Initiate the Video Repair Process
Once you’ve added the videos, the tool will display all the information associated with the files. After reviewing the files, hit the “Repair” button at the bottom right to start the repair process.
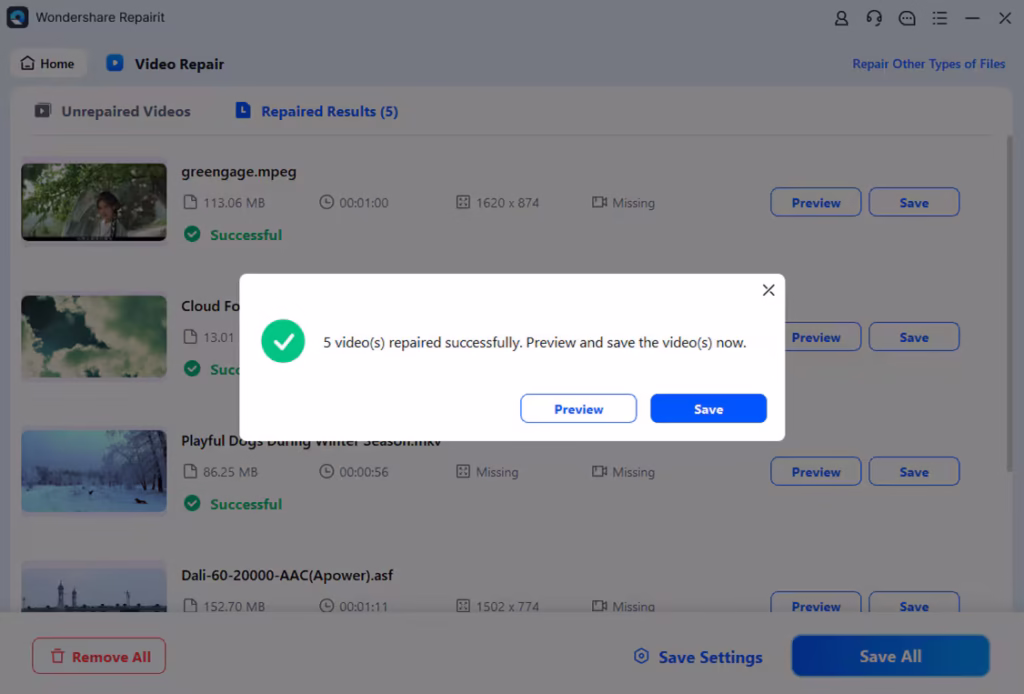
Step 3. Download the Repaired Videos
When the video repair is complete, a window will appear to inform you about the completion of the process. Within that, tap the “Preview” button to see whether the repaired videos still flicker. Once satisfied with the output, press the “Save All” button to download the repaired videos to your computer.
Part 3. How To Remove Flickering From Video: Other Solutions
After exploring Wondershare Repairit’s advanced solution for resolving video flickering issues, let’s explore some other efficient solutions to address this problem.
1. Try Using an Online Video Repair Solution
Repairit Online even provides an online service to deliver a quick fix for flickering in corrupted videos without the need for additional downloads. This online video repair tool is compatible with several video file formats, such as MP4, AVI, and others. Follow the given guide to repair corrupt video files using Repairit’s online video repair:
Step 1. Upload Your Flickering Videos Across Repairit Online
After accessing the Online Video Repair page, click the “Add” button to access the tool’s main workspace. Then, hit the “Add Video” button to upload the videos with distortion or flickering.
Step 2. Initiate the Video Repair Task
Videos will be shown on the interface with their information, including size, resolution, and more. After viewing the info, hit the “Repair All” button to begin the process of repairing corrupt video files.
Step 3. Preview and Save the Repaired Videos
You can play videos to see if the flickering issue is resolved when the process is complete. Finally, save the repaired videos to your device by tapping on the “Download All” button.
2. Manage Lighting Conditions
At times, the flickering problem may arise from unsuitable lighting conditions in your video. To begin with, LED lights that run on alternating current frequently create flickering as they switch on and off. This happens particularly when their frequency is not in sync with the camera’s frame rate. Additionally, although typically stable, HMI lights may flicker if the power source is unreliable.
In footage captured outdoors, natural light can cause video flickering when clouds move, obstructing the sunlight. Additionally, unstable power supplies can lead to fluctuations in light intensity that often result in distortion in videos. To avoid this, use flicker-free lights, shoot in stable lighting conditions, and ensure a stable power supply.
3. Set Camera Settings
In the above part, we discussed how lightning conditions can cause flickering in your videos. We will now focus on the essential camera settings that can help prevent this issue:
- Aperture: We recommend you choose a wide aperture for a blurred background or a narrow one for more depth of field and sharper focus.
- Shutter Speed: You should also set your shutter speed to a value that’s twice the frame rate. For example, use 1/120 for 60 FPS to avoid flickering in footage.
- ISO: Users can set their ISO to the lowest level possible to reduce footage noise and raise it when necessary for lighting while counterbalancing it with aperture.
- Frame Rate: For optimal video settings, start with a frame rate of 24 FPS for a cinematic look or 60 FPS for smooth slow-motion shots. Moreover, 30 FPS is the popular choice for interviews or live streaming.
- White Balance: Balance by adjusting the white balance with kelvin to a natural level, like 5500K for daylight, 3500K for golden hour, and 6500K for overcast light.
4. Apply Anti-Flicker in Adobe Premiere Pro
Anti-Flicker is a crucial functionality in Adobe Premiere Pro designed to combat distortion or flickering issues found in recorded videos. This approach is helpful when your video experiences flickering and repair methods cannot resolve the issue. You can reduce the severity of the flickering by altering the preset configurations of the Flicker Free function. To understand how to remove flickering from the video, refer to the instructions below:
Step 1. After importing the flickering video to the timeline, head to the “Effects” panel on the right side of the screen and locate the “Flicker Free” feature.
Step 2. Drag the “Flicker Free” effect and drop it on your video on the timeline. After applying the effect, go back to the “Effects Control” panel and access the “Flicker Free” settings. Here, expand the “Presets” menu and choose a preset like slow motion or any other that fits the type of flicker you’re addressing. As you select a preset, the flickering will be removed from the video to a large extent.
Conclusion
To wrap up, this article explored the common causes of the flickering issue. Also, we have provided effective solutions for overcoming video flickering issues. One of the major reasons for video distortion is video corruption. For such cases, using Repairit is highly recommended, as it offers a one-click solution for repairing corrupted videos.
Caroline is doing her graduation in IT from the University of South California but keens to work as a freelance blogger. She loves to write on the latest information about IoT, technology, and business. She has innovative ideas and shares her experience with her readers.


