
For anyone who has ever stared at a 2D sketch and wished it could materialise as a physical object, the roadblock has rarely been imagination. It has always been the translation layer—the tedious, technical process of turning a flat visual reference into a watertight 3D mesh that a slicer will actually accept. Traditional modelling software demands hours of manual extrusion, sculpting, and topology cleanup. Heightmap-based converters offer speed but produce flat, relief-style geometry that looks nothing like the original subject. Over the past year, a handful of AI-driven tools have attempted to bridge this gap, but most still feel like experimental demos rather than practical workshop instruments. That is precisely why the convert image to stl workflow caught my attention—not as a magic button that replaces skilled modelling, but as a pragmatic bridge that rethinks how a 2D reference becomes a 3D starting point.
Why the Traditional Image-to-STL Pipeline Falls Short
The conventional approach to turning an image into an STL file has been remarkably consistent for decades. Upload a photo, run an extrusion algorithm, and receive a heightmap—a 3D surface where brightness values determine elevation. This works beautifully for logos, embossed nameplates, and lithophanes. It fails completely for figurines, replacement parts, character concepts, or any object where the shape is defined by silhouette and form rather than surface relief.
The core limitation is that heightmap-based tools never actually understand what they are looking at. They see pixels and brightness, not subjects, silhouettes, or depth cues. The result is geometry that looks like a bas-relief carving rather than a fully realised 3D object. For a logo plaque, that is exactly what you want. For a tabletop miniature or a cosplay armour component, it is a dead end before you even start.
The AI reconstruction approach takes a fundamentally different path. Instead of mapping brightness to height, it analyses the image—the subject, the silhouette, the contrast boundaries, the visible depth cues—and attempts to rebuild a fuller three-dimensional form. This is not a new concept in computer vision, but applying it to practical 3D printing workflows with a clean, accessible interface is relatively recent. The distinction matters because the output is not a relief; it is a genuine starting mesh that captures the overall proportions and major forms of the original subject.
The Three-Step Workflow That Changes the Game
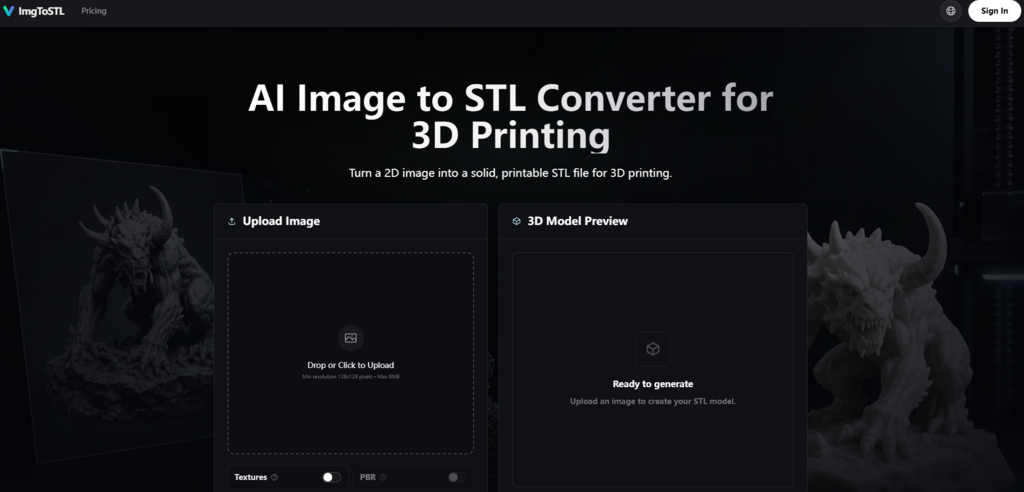
What makes this particular implementation worth examining is not just the AI engine but the discipline of the interface. The entire process is condensed into three clear steps: Upload, Generate, Export. No account creation, no mandatory email capture, no intimidating parameter panels. This simplicity is deceptive because it masks the complexity happening under the hood, but from a practical user perspective, it transforms a traditionally technical operation into something approachable.
Upload: Clear Rules for Reliable Results
The upload step establishes guardrails that prevent wasted effort. Accepted formats include JPG, PNG, JPEG, and WebP, with a minimum resolution of 128×128 pixels and a maximum file size of 8MB. These limits are practical rather than restrictive—they ensure the AI has enough visual information to work with while rejecting files that would produce poor results anyway.
What matters more than the technical specifications is the guidance on what makes a good source image. The site is unusually frank about this: clear single-object images with a centred subject, strong lighting, visible edges, and a simple background produce the best results. Product photos, toy references, character concepts, props, sketches, and simple part photos are ideal. Thin wires, transparent objects, reflective surfaces, low-contrast photos, and busy backgrounds are risky. This honesty is valuable because it sets realistic expectations and helps users self-select images that will actually work.
Generate: AI Reconstruction in Practice
The generation step is where the AI does its work. The system analyses the uploaded image—reading the subject, silhouette, contrast, and visible depth cues—then builds a mesh that can be previewed before export. The result is not a finished model but a solid 3D starting mesh that captures the essential geometry of the original reference.
One of the more practical aspects of this step is the speed. The site highlights fast iteration as a core benefit, allowing users to generate solid model candidates quickly and validate shapes and proportions before final printing. In practice, this means you can treat the converter as an iterative sketchpad rather than a batch-and-wait process. Generate a candidate, preview it, adjust the source image, generate again. This iterative loop is where the tool delivers real value—not as a one-shot solution but as a rapid prototyping engine.
Export: STL First, Flexibility Second
The export step defaults to STL, which is exactly what a 3D printing workflow requires. However, the tool also keeps GLB, OBJ, and FBX options available for users who need to move models into rendering or animation pipelines. This flexibility is useful because not every project ends at the slicer. Sometimes you need to do cleanup in Blender or Meshmixer first, and having multiple format options saves an extra conversion step.
What the Tool Actually Delivers Across Real-World Use Cases
The true test of any image-to-STL converter is not how it performs on ideal test images but how it handles the messy, imperfect references that real users actually bring to the table. The site outlines several specific use cases, and each reveals something different about the tool’s strengths and limitations.
Miniatures and Tabletop Props
For tabletop gamers and miniature painters, the ability to turn character art or reference photos into a printable starting model is transformative. The AI captures the overall silhouette and major forms—the body, limbs, and head emerge as distinct geometric regions rather than a melted blob. This gives you a base that gets the proportions right so you can focus on adding detail rather than rebuilding from scratch.
The limitation, predictably, is fine detail. Fingers, facial features, and small accessories come through as suggestive forms rather than crisp geometry. The site acknowledges this directly: extremely complex details may still need cleanup in Blender, Meshmixer, or your slicer before final printing. For a starting point, this is acceptable. For a finished miniature, you will want to do additional sculpting.
Photo-to-STL for Custom Parts
This is where the tool genuinely surprised me. Photographing a broken part and converting it into an STL for a replacement is a classic maker use case, and the AI handles it surprisingly well for simple mechanical shapes with clear outlines and good contrast. The mesh captures the basic form and mounting points with enough accuracy that you can import it into a CAD tool, take measurements, and refine it for printing.
The catch is dimensional accuracy. STL files store geometry only, so scale, wall thickness, and orientation all need to be checked in your slicer or modelling tool. The site recommends using Blender, Meshmixer, Fusion 360, or Tinkercad for cleanup, hollowing, smoothing, or edits. For simple parts, this is a manageable workflow. For precision engineering, you will want to do the final modelling in a dedicated CAD package.

Rapid Prototyping from Sketches
For product designers and industrial designers, the ability to move from a quick product sketch to a 3D model in minutes rather than hours is a genuine productivity gain. The AI handles hand-drawn sketches reasonably well when the sketch has clear outlines and good contrast between the subject and the background. The generated mesh captures the overall form and proportions, which is exactly what you want at the early prototyping stage—a physical object you can hold and evaluate before investing time in detailed CAD modelling.
The limitation is that sketches with ambiguous lines, overlapping forms, or low contrast produce muddier results that require significant interpretation and cleanup. The site advises that clear single-object images usually produce the best results, and this rule applies doubly to sketches.
DIY and Cosplay Armour
For cosplayers and prop makers, the tool offers a fast way to turn character sketches, jewellery designs, or armour concepts into physical 3D-printable parts. For larger, blockier forms like pauldrons, chest plates, and gauntlets, the AI generates meshes that are recognisably the right shape and scale. The ability to iterate quickly makes it easy to dial in the proportions before committing to a full print.
The limitation is that organic, flowing shapes with complex curves and undercuts are more challenging. The AI tends to simplify complex surfaces, which can be a benefit if you are looking for a clean, stylised look, but a drawback if you need every curve and contour from the original concept art.
A Practical Guide for Cleaner Results
The site includes a useful guide for getting better results, and it is worth summarising because it reflects genuine practical experience rather than marketing hype.
The workflow estimates 3D shape from a 2D reference, builds a mesh, then exports the geometry as an STL file. For photos and sketches, AI reconstruction can create fuller 3D forms than a simple heightmap. For logos or flat art, the result may behave more like relief, embossing, or extrusion—which is a honest admission that this tool is not the right choice for every type of image.
The best source images have a centred subject, strong lighting, visible edges, and a simple background. Product photos, toy references, character concepts, props, sketches, and simple part photos work well. Thin wires, transparent objects, reflective surfaces, low-contrast photos, and busy backgrounds are risky. For logos, icons, and QR codes, a dedicated relief or extrusion workflow may be more predictable.
After downloading an STL, inspect the mesh before printing. STL files store geometry only, so scale, wall thickness, orientation, supports, and material settings should be checked in your slicer or modelling tool. Open the file in Cura, PrusaSlicer, Bambu Studio, or another slicer to check scale and supports. Use Blender, Meshmixer, Fusion 360, or Tinkercad for cleanup, hollowing, smoothing, or edits. Watch for non-manifold edges, parts that are too thin, disconnected pieces, and missing flat bases.
Understanding the Economics: Credits, Not Subscriptions
The pricing model is worth understanding because it shapes how you use the tool. AI generation requires credits, so it is not an unlimited free image-to-STL converter. You can upload an image and inspect examples before choosing a paid credit pack, which is a sensible way to evaluate the tool without committing financially.
The credit packs are straightforward: Starter at $9.90 for 800 credits, Pro at $29.90 for 3,000 credits, and Max Value at $69.90 for 8,000 credits. All paid tiers include a commercial license, which is significant if you plan to sell printed models or use them in commercial products. Credits are valid for up to one year, and there is no subscription required.
The per-generation cost varies by pack, with the Max Value tier offering the lowest effective rate at approximately $0.87 per 100 credits. For context, the Starter pack provides roughly 11 generations, the Pro pack roughly 42 generations, and the Max Value pack roughly 114 generations. Whether this represents good value depends entirely on how frequently you need to generate models and whether you value the speed and convenience over the time cost of manual modelling.
What the Tool Does Not Do (And Why That Matters)
The site is unusually transparent about limitations, and this honesty builds trust. The FAQ explicitly answers the question “Does every image become a perfect printable STL?” with a clear “No”. Clear single-object images with good lighting work best. Thin parts, busy backgrounds, flat logos, and low-contrast photos may need cleanup or small edits after generation.
The tool is not a replacement for skilled modelling. It is a starting point. Extremely complex details or low-contrast photos may still need cleanup in Blender, Meshmixer, or your slicer before final printing. The generated meshes are designed for printable STL workflows and aim to generate solid meshes that are ready for slicer review, but the review step is essential.
For logos, icons, and QR codes, a dedicated relief or extrusion workflow may be more predictable. This is an important caveat because it acknowledges that the AI approach is not universally superior—it is better for some use cases and worse for others.
Who Benefits Most from This Workflow
After considering the tool across multiple use cases and understanding its genuine limitations, a clear picture emerges of who benefits most.
Makers and hobbyists who want to turn photos, sketches, or reference art into printable models without learning complex modelling software will find this tool genuinely useful. The three-step workflow removes the technical barrier that traditionally separates a visual idea from a physical object.
Product designers and engineers who need to rapidly prototype from sketches or reverse-engineer simple parts from photographs will appreciate the speed. Moving from a quick sketch to a 3D model in minutes rather than hours changes the economics of early-stage prototyping.
Cosplayers and prop makers who work with hard-surface armour and accessories will find the tool valuable for rapid iteration. The ability to generate a candidate, preview it, tweak the source image, and generate again makes it easy to dial in proportions before committing to a full print.
Tabletop gamers who want to create custom miniatures or terrain pieces from character art or reference photos will find the tool a practical starting point. The generated mesh captures the overall form, leaving detail work for later refinement.
The tool is less suitable for projects that require micron-level precision, complex organic forms with intricate detail, or logo and icon work where a dedicated extrusion workflow is more predictable. It also requires basic comfort with mesh cleanup—the generated STL is a starting point, not a finished model.

A Practical Bridge, Not a Silver Bullet
The image to stl converter does not promise to replace your modelling software, and it does not need to. What it offers is something more practical: a fast, accessible bridge between the 2D references you already have and the 3D prints you want to make. The three-step workflow is refreshingly direct. The AI reconstruction produces genuinely useful starting meshes rather than simple heightmaps. The preview step gives you a chance to catch issues before you commit credits or filament. And the honest documentation about limitations sets realistic expectations that prevent disappointment.
Is it perfect? No. The quality of the output depends heavily on the quality of your input image. Complex details will need manual cleanup. The credit-based model means you are paying for each generation rather than a flat subscription. For logos and flat art, a traditional extrusion workflow may be more predictable.
But for the use cases it is designed for—miniatures, replacement parts, prototypes, cosplay props, and rapid iteration—it delivers exactly what it promises: a solid, printable starting point that gets you from image to STL in minutes rather than hours. That is not a replacement for skilled modelling. It is a complement to it. And for many makers, that is exactly the tool they have been waiting for.
Sandra Larson is a writer with the personal blog at ElizabethanAuthor and an academic coach for students. Her main sphere of professional interest is the connection between AI and modern study techniques. Sandra believes that digital tools are a way to a better future in the education system.


